
Native Stack Navigator: Native Performance, Less Customization
Native Stack Navigator uses the OS's built-in screen management for smooth, performant transitions. Use it for standard screen stacks where a native look and feel is key.
Nested Navigators: Building Complex UI Flows
Think of nested navigators as UI building blocks, placing one navigator (like tabs) inside a screen of another (a stack). This creates flows like a main tab bar inside a stack for modals.
React Navigation: Configuring Screen Options
Treat screen options like CSS for your React Navigation screens, letting you style headers and tabs. Apply styles to a single `Screen` with the `options` prop, or to a `Group` of screens with `screenOptions`.
Escape Prop Drilling with React Navigation Hooks
React Navigation hooks let components control navigation without prop drilling. `useNavigation` gives you the `navigation` object to change screens, while `useRoute` provides data about the current screen. The footgun: they only work inside a navigator.
Passing Data to Routes in React Native
Think of it like passing arguments to a function. When you navigate to a new screen, you give it the data it needs, like a product ID. This is key for master-detail views. The footgun: only pass JSON-serializable data to avoid breaking state persistence.
Drawer Navigator: Your App's Slide-Out Main Menu
A Drawer Navigator is your app's slide-out 'hamburger' menu. Use it for primary navigation between distinct sections like Home, Profile, and Settings. A common footgun is misconfiguring `backBehavior`, leading to non-intuitive back button actions for users.
Stack Navigator: JavaScript-based Screen Transitions
Stack Navigator treats your screens like a stack of cards: push a new screen on top, pop it off to go back. It’s ideal for standard navigation flows, but its JavaScript-based implementation means you trade the performance of a native solution for…
React Native Reanimated: Off-Thread Animations
Reanimated moves animations off the busy JavaScript thread onto the native UI thread. This ensures smooth, 60-120 fps performance for gestures and transitions, even during heavy JS computation.

Expo Application Services (EAS): The Cloud Toolchain for React Native
Expo Application Services (EAS) is the cloud toolchain for production React Native apps. It handles complex native builds, app store submissions, and over-the-air updates. The main footgun is confusing it with the local `expo` CLI for development.

Metro: The JavaScript Bundler for React Native
Metro bundles your React Native app's JavaScript, finding all modules, transpiling them for the device, and merging them into one file. It's what powers `npx react-native start`.

On-Demand Resources: Keep Your App Bundle Slim
On-Demand Resources (ODR) host app assets on the App Store, not in your bundle, shrinking your initial download. Use it for game levels or tutorials not needed at first launch. The OS downloads assets by "tag" when requested, but can also purge them to save.

App Thinning: Ship Only What's Needed
App Thinning shrinks your app's download by delivering only the assets a specific device needs. The App Store uses Slicing for device-specific art and code, and you can use On-Demand Resources for assets downloaded after installation.
Navigating Apple's App Store Submission and Review
Think of App Store submission as a strict gatekeeping process, not just an upload. You must prove your app is safe, reliable, and transparent via App Store Connect.
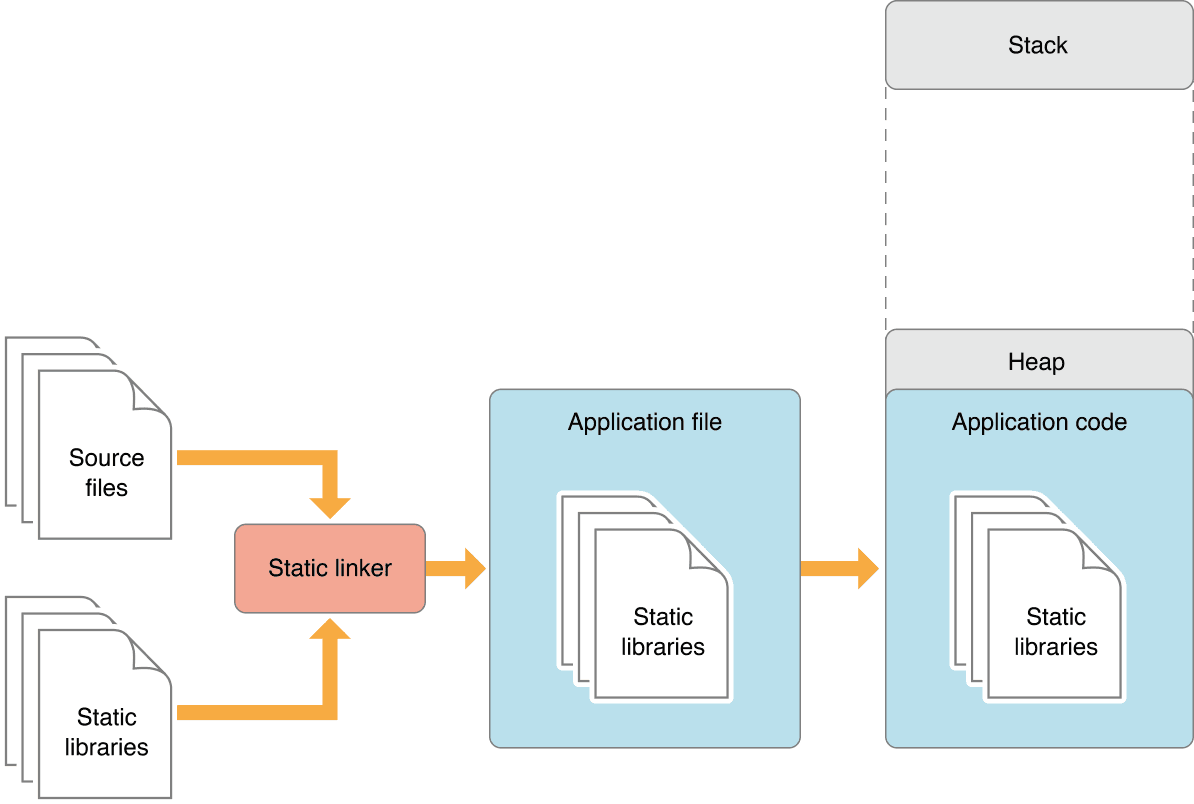
Static vs. Dynamic Linking: Code Size vs. Flexibility
Static linking bakes library code into your app, creating a large but self-contained executable. Dynamic linking loads libraries at runtime, saving space. This choice impacts app size, launch time, and updates.

XCUITest Page Object Model: Tame Your UI Tests
The Page Object Model treats each app screen as an object, separating test logic from UI interaction. In XCUITest, this creates stable tests for complex apps. The biggest footgun is forgetting synchronization—always wait for views to load before interacting.

Mocking: Faking Dependencies in Unit Tests
A mock is a stunt double for a real object in your unit tests, letting you control its behavior. Use it to fake dependencies like network clients for fast, predictable tests. The footgun: over-mocking can create tests that pass but miss real integration bugs.
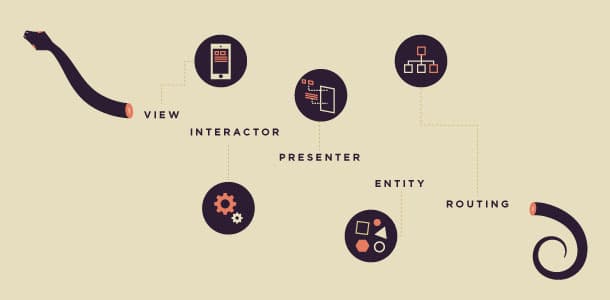
VIPER: Taming Massive iOS View Controllers
VIPER is a strict architectural pattern that tames "Massive View Controllers" by splitting features into five layers: View, Interactor, Presenter, Entity, and Router. It's used in large iOS apps to make business logic and navigation explicitly testable.

The Coordinator Pattern: Untangling iOS Navigation
The Coordinator pattern makes a separate object the 'boss' of app navigation, leaving view controllers to just manage their view. This lets you reuse views in different flows without them knowing what comes next.

Dependency Injection in Swift: Stop Creating, Start Receiving
Dependency Injection means objects receive their dependencies from the outside rather than creating them internally. It's used to give a view model a network client or data source, making it testable.

MVVM: Separate SwiftUI Logic from Layout
MVVM separates logic from layout by moving state and business logic out of your SwiftUI View into a dedicated ViewModel class. This makes your code cleaner, more organized, and easier to test.